New concrete or terracotta tile roof installation in Perth must comply with Australian Standards, the National Construction Code (NCC), and Western Australian guidelines to ensure structural integrity, weatherproofing, wind resistance, and long-term performance in WA’s hot, dry, and occasionally stormy conditions.
Primary Standards & Requirements
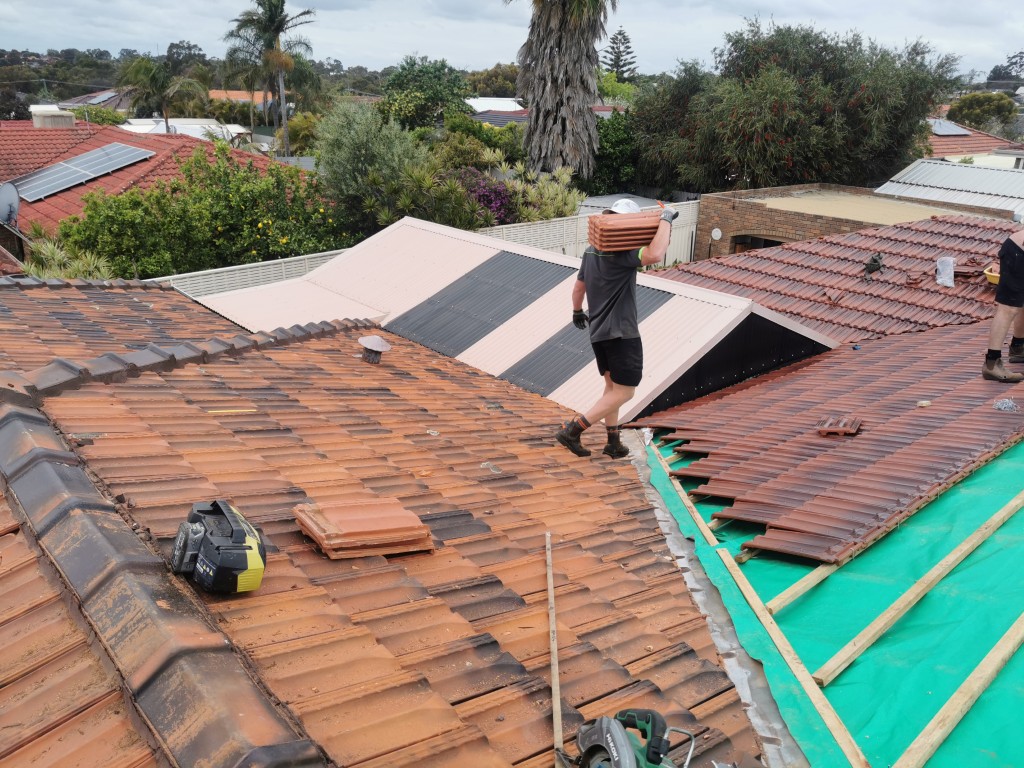
AS 2050:2018 – Installation of Roof Tiles
Governs correct placement, mechanical fixing, sarking/underlay, battens, valley trays, flashing, ridge/hip bedding & pointing, and workmanship standards for domestic tiled roofs.
AS 2049 – Roof Tiles
Defines minimum quality, strength, dimensional tolerances, and testing requirements for concrete and terracotta roof tiles.
National Construction Code (NCC) 2022 Volume Two – Part 7.3 Roof Tiles
- Applies to wind classifications N1–N6 (Perth metro typically N3–N4).
- Sarking mandatory for roof pitches below 18° or when rafter/truss lengths exceed limits in Table 7.3.3.
- Minimum tile overhang to gutters: 35 mm.
- Anti-ponding boards required for pitches below 20° where no sufficient overhang exists.
- Flashing: continuous, minimum 75 mm upturn to vertical surfaces, 150 mm width, compatible materials, dressed into tiles.
WA Guide to Standards and Tolerances 2019
- Tile overhang to gutters: 35–65 mm (outside this range is defective).
- Alignment undulations: maximum 20 mm deviation over any 4 m length.
- No visible cracks, chips, irregularities, or discolouration from ground level.
- Pointing: uniform finish, no cracking or dislodgement within first 12 months.
- Valleys, flashings, and accessories installed strictly per manufacturer and NCC instructions.
- Any roof leakage attributable to installation faults is defective.
Important Installation Checklist
- Obtain building permit from local council if required (new roof or significant change).
- Verify roof frame adequacy (rafter/truss spacing, strength, tie-downs) for tile weight.
- Install approved sarking membrane fully per pitch and length tables.
- Fix timber or metal battens level, correctly spaced, staggered joints, secure fixings.
- Lay valley trays and accessories before tiling.
- Install tiles with consistent 35 mm minimum overhang into gutters.
- Fix tiles and accessories according to wind classification schedule (e.g., clips, screws, every tile in exposed areas).
- Fit step flashings, apron flashings, wall flashings with minimum 75 mm upturn.
- Install anti-ponding boards where pitch <20° and overhang inadequate.
- Bed and point ridges, hips, and valleys uniformly with compatible mortar.
- Clean roof thoroughly, remove debris from gutters and site.
- Conduct final inspection for alignment, fixing security, leaks, and defects before handover.
Use only licensed roof tilers and follow tile manufacturer instructions to ensure full compliance and warranty validity.